Free Certificates from Sectigo
Sectigo has perhaps one of the easiest procedures for requesting an email certificate. They are free, good for a year, and can be picked up using most browsers.
Instructions for macOS
Fill out the Application for Secure Email Certificate and you will be emailed the instructions. We recommend using Safari for this and selecting a Key Size of 2048 (High Grade). On the Mac, you will download a CollectCCC.p7s file to your computer.
Getting the Key Ready on macOS
- Double-click the downloaded CollectCCC.p7s file and Keychain Access will ask you to import it. The default keychain is Login, and this is OK. Click the Add button. (If you receive an error, simply click OK to dismiss the error.)
- In Keychain Access, click on login and then Certificates below.
- On the right you should see:
1) a certificate titled: "Sectigo RSA Client Authentication and Secure Email CA" and
2) a personal certificate with your email address
- In Keychain select "Sectigo Client Authentication and Secure Email CA" and from the File menu select Export Items.... The file format should be Certificate (.cer). Save the file to the Desktop.
- In Keychain, expand the personal certificate with your email address using the triangle so that underneath you see it's key. Select the certificate (not the key) and select Export Items... from the File menu. The file format should be Personal Information Exchange (.p12).
- Save the file to the Desktop.
- Enter a password to protect the key.
Importing the Certificate into Postbox
To import a certificate into Postbox:
- Postbox > Preferences > Advanced > Certificates > Manage Certificates > Your Certificates > Import...
- Select the .p12 file for import. You will be prompted for the password you used when you exported (or backed up) the file.
- Next go to: Postbox > Preferences > Advanced > Certificates > Manage Certificates > Authorities > Import...
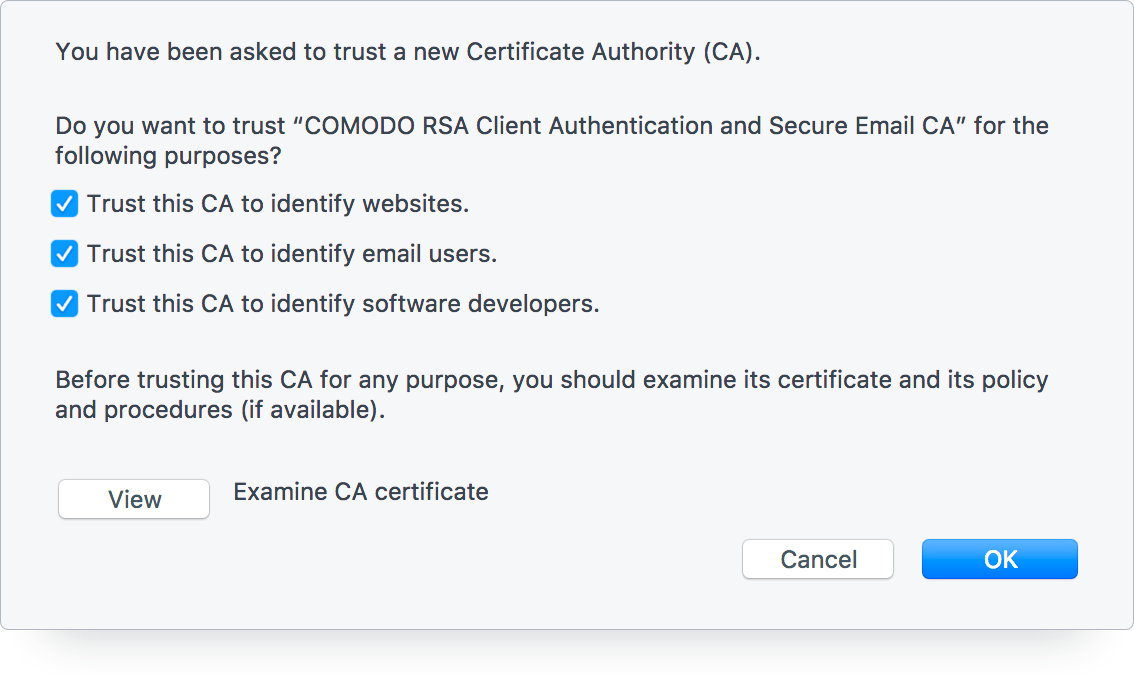
- Select the Sectigo RSA Client Authentication and Secure Email CA.cer file that you saved to your Desktop for import. In the pop-up dialog please select all of the checkboxes and click OK.

Setting up an Identity to Sign
Once you have imported your certificate into Postbox, it will be available for pairing with one or more accounts in Postbox.
- Go to Postbox > Preferences (Mac) or Options (Windows) > Accounts > <your account> > Security
- Click the Select button under Digital Signing and select your certificate. You can also use the same certificate for S/MIME Encryption is desired.
Sending a Signed Message
Compose a message, and from the Options menu select Digitally Sign This Message.
Instructions for Windows
Fill out the Application for Secure Email Certificate and you will be emailed the instructions. On Windows, you will install the certificates using a browser by loading a URL.
Be sure to use the correct browser for key generation, we highly recommend using Firefox.
1) In the confirmation email that you receive cut and paste the URL into Firefox, then enter the password given.
2) You will see a message stating that your certificate is being installed. Do not close the window!
3) A message will be displayed that your certificate was installed successfully.
Export the Certificate from Firefox
1) Inside Firefox go to Tools -> Options (Windows), Edit -> Options
2) Then go to Advanced -> General -> Encryption and click on "View Certificates".
3) Select the tab that says "Personal" or "Your Certificates".
4) Highlight the certificate that expires 1 year from when you applied for your certificate.
5) Once highlighted select the button that says "Backup".
6) Next, one should be prompted to save the file.
Recommended:
* Save location: Desktop
* File Name: email address; Ex: [email protected] would become support_sectigo_com
* File type: PKCS12 Files (*.p12)
7) Provide a password for your .p12 file.
8) Click 'Save'
Import the Certificate into Postbox
1) Inside Postbox go to "Tools menu > Options > Accounts > your email account > Security > Manage Certificates to load the Postbox Certificate Manager.
2) Click "Import" and supply the password you created above.
3) Close the Certificate Manager.
4) Click "Select".
5) Select your certificate from the drop-down menu and click "OK" when finished.
6) Perform the above step for Digital Signing.
*** If you wish to digitally sign every message, please select the option "Digitally Sign Messages (by default)"
7) Click "OK" to exit the "Account Settings" window.
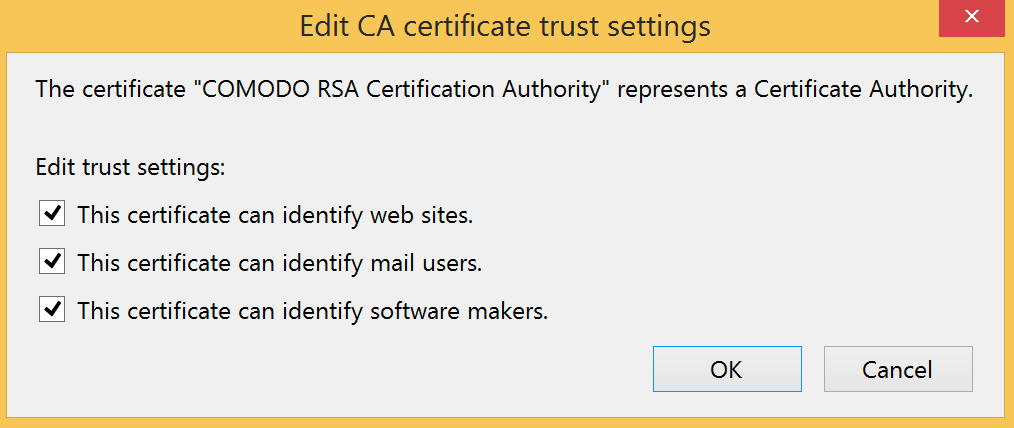
8) Go to Postbox > Preferences (Mac) or Options (Windows) > Advanced > Certificates > View Certificates > Authorities. Select Sectigo RSA Certification Authority and then click the Edit Trust... button.
Note that Comodo is now called Sectigo, so in the screenshots below, please select the Sectigo equivalent.
Select the following checkboxes:

Click okay.
Repeat this process for the Sectigo RSA Client Authentication and Secure Email CA.
Setting up an Identity to Sign
Once you have imported your certificate into Postbox, it will be available for pairing with one or more accounts in Postbox.
- Go to Postbox > Preferences (Mac) or Options (Windows) > Accounts > <your account> > Security
- Click the Select button under Digital Signing.
Sending a Signed Message
Compose a message, and from the Options menu select Security > Digitally Sign This Message.
This article includes content contributed by the MozillaZine Knowledge Base. Thank you to all of the contributors who created this content and to MozillaZine for sharing this information.